Blogs

Why AI Is Important in Digital Marketing

Why AI is Important in Digital Marketing? (2026)

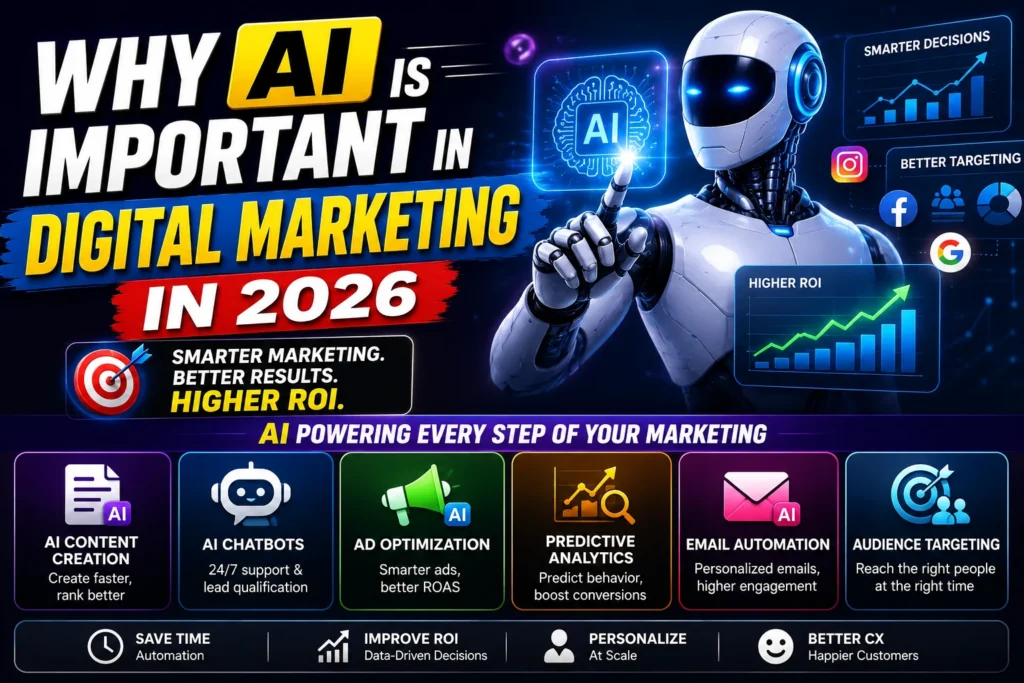
Explore why AI is important in digital marketing in 2026. Learn how AI improves content, ads, targeting, analytics, email automation, and customer experience to boost ROI. AI isn’t a “nice-to-have” in digital marketing anymore—it’s a competitive advantage. In 2026, marketers are expected to do more with less: create more content, run faster campaigns, analyze more data, and personalize experiences across multiple channels. That’s exactly where AI in digital marketing becomes essential. AI helps businesses automate repetitive tasks, analyze customer behavior, personalize campaigns, and improve customer experience—while saving time and improving ROI. This article breaks down why AI is important in digital marketing, what AI actually does behind the scenes, the top use cases (content, chatbots, ad optimization, predictive analytics, email automation, audience targeting), and how beginners and businesses can use AI effectively without losing brand authenticity. What Does AI Mean in Digital Marketing? AI (Artificial Intelligence) in digital marketing refers to technology that can: learn from data (customer behavior, clicks, purchases) Identify patterns humans may miss predict outcomes (who will convert, what will perform) automate tasks (content, ads, emails, chat) personalize experiences at scale Simple definition:AI in marketing = data-driven automation + smarter decision-making. Why AI Is Important in Digital Marketing in 2026 1) Marketing Is Too Fast for Manual Work Customer behavior changes quickly—platforms update weekly, trends shift daily, and ad performance fluctuates in real time. AI helps marketers respond faster by: monitoring performance continuously adjusting campaigns automatically suggesting improvements based on data 2) Personalization Is Now Expected People don’t want generic marketing. They expect messages that feel relevant: right product right time right offer right channel AI makes personalization possible at scale by segmenting audiences and tailoring content automatically. 3) Data Is Huge (AI Makes It Actionable) Businesses collect data from: websites ads platforms CRMs emails social media AI helps turn this data into insights like: Which audience converts best Which creative will likely win What customers want next 4) AI Improves ROI by Reducing Waste AI-driven optimization helps reduce: wasted ad spend low-quality leads irrelevant traffic Poor email engagement The result is better performance with fewer resources. Core Benefits of AI in Digital Marketing ✅ Time Savings (Automation) AI reduces time spent on: writing drafts creating variations reporting segmentation repetitive customer responses ✅ Better Decisions (Analytics + Prediction) AI identifies patterns such as: Which users are likely to buy Which ad creatives will perform Which email sequences convert ✅ Higher Conversions (Personalization) AI can personalize: product recommendations landing page content ads messaging email subject lines ✅ Consistent Optimization (Always-On Improvement) AI tools can continuously test and optimize: ads bidding targeting placements creatives AI-Powered Tools Used in Digital Marketing Below are the major areas where AI is already transforming marketing. 1) AI for Content Creation (Faster, Smarter Content) AI helps marketers create and improve content faster, including: blog outlines and drafts social media captions ad copy variations video scripts SEO meta titles/descriptions content repurposing (blog → reel → carousel) Where AI Helps Most speeding up content production generating multiple angles quickly overcoming writer’s block optimizing for clarity and structure Best Practice (Important) AI should support your content—not replace your expertise. What works best in 2026:AI draft + human experience + real examples + brand tone. 2) AI Chatbots (24/7 Customer Support + Lead Qualification) AI chatbots are used to: Answer FAQs instantly qualify leads (budget, needs, location) book appointments provide product recommendations reduce customer support load Why This Matters Customers want instant answers. If they wait, they leave. AI chatbots help businesses: increase lead capture improve response time boost customer satisfaction Example use case:A real estate chatbot asking: “What is your budget?” “Which location are you interested in?” “When do you want to visit?” That’s direct lead qualification—automated. 3) AI for Ad Optimization (Better ROAS, Smarter Spending) AI has changed performance marketing heavily. AI is used in ads to: Optimize bidding automatically Find winning audiences faster Test creative combinations Adjust placements based on performance Reduce cost per lead (CPL) and cost per acquisition (CPA) Platforms Where AI is Already Built In Google Ads (Smart Bidding, Performance Max) Meta Ads (Advantage+ audiences, AI optimization) YouTube/Shorts ad delivery systems Why This Matters Manual ad optimization is slow. AI can: respond in real time scale winners faster reduce human guesswork Important note:AI improves results only when tracking is correct (GA4, Pixel, conversions). 4) Predictive Analytics (Forecast What Customers Will Do Next) Predictive analytics uses AI to forecast behaviors like: Who is likely to buy Who is likely to churn What product might someone purchase next When customers typically convert How Marketers Use It to prioritize high-quality leads to run smarter remarketing campaigns to improve email timing to plan inventory and offers (e-commerce) Example:If AI predicts that visitors from a certain keyword convert 3x higher, you can: Increase ad budgets for that segment Create more content around that intent 5) AI for Email Automation (Smarter Segmentation + Better Engagement) Email still performs in 2026—but generic email blasts don’t. AI improves email marketing by: segmenting users automatically personalizing subject lines optimizing send times recommending product/email content predicting who will open/click What This Leads To higher open rates higher click rates better conversions fewer unsubscribes AI-powered email automation makes your emails feel more relevant and less “spammy.” 6) AI for Audience Targeting (Reach the Right People) Audience targeting is one of the biggest reasons businesses waste ad spend. AI helps by: analyzing behavior patterns creating lookalike audiences detecting purchase intent signals improving retargeting accuracy optimizing audiences over time Instead of guessing, AI continuously refines targeting based on results. Key insight:AI doesn’t replace your strategy—it improves your targeting once your funnel is clear. How AI Improves Customer Experience (CX) Customer experience is a ranking factor, conversion factor, and retention factor. AI improves CX through: faster support (chatbots) personalized recommendations better onboarding sequences smarter follow-ups reducing friction at each step When customers feel understood, conversions increase. Real-World Examples of AI in Digital Marketing Example 1: Content Repurposing AI turns: one blog post → 5 Reels

Why AI is Important in Digital Marketing? (2026) Read More »
Why Your Google Ads Are Wasting Budget

Why Your Google Ads Are Wasting Budget(2026)

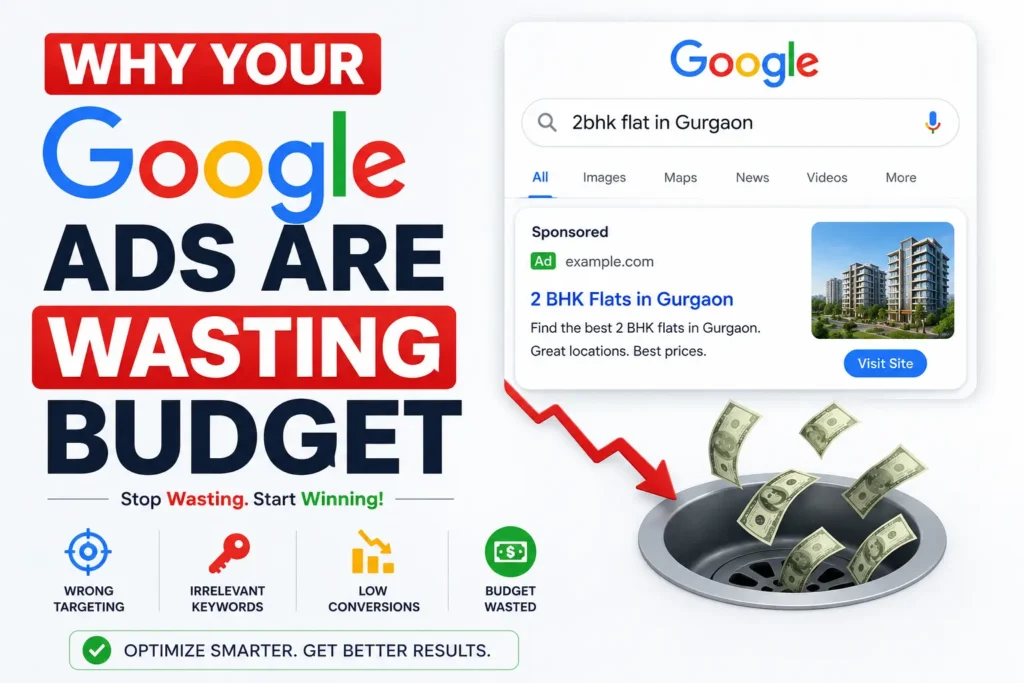
Why Your Google Ads Are Wasting Budget and How to Fix It in 2026. Is your Google Ads budget disappearing with little return? I break down the most common Google Ads campaign mistakes draining your ROAS in 2026 — and the exact fixes that restore performance. How to Fix Why Your Google Ads Are Wasting Budget You are spending money on Google Ads every single day. The clicks are coming in. The dashboard looks busy. But when you check the revenue, the numbers do not add up. This is not an unusual situation. It is the default situation for most Google Ads accounts that have not been properly audited and optimized. According to WordStream’s 2026 analysis, the average Google Ads account wastes 61% of its budget on irrelevant clicks, poor keyword targeting, and broken tracking. More than half of every rupee spent is going somewhere it should not. I have reviewed enough Google Ads accounts across different industries to know that budget waste rarely comes from one catastrophic mistake. It comes from several small, structural decisions — made at setup, never revisited — that compound into a serious performance problem over time. This article breaks down every major mistake I have seen draining Google Ads budgets in 2026, explains exactly why each one happens, and gives you the specific fixes that restore ROAS. Work through these in sequence, and your account will look different in 30 days. First Fix Your Conversion Tracking in Google Ads Why Broken Tracking Is the Root of Most Google Ads Problems I want to be direct about this before we discuss anything else: if your conversion tracking is broken, everything else in this article is irrelevant. Google’s Smart Bidding algorithms — Target ROAS, Target CPA, Maximize Conversions — optimize toward whatever you define as a conversion. If that definition is wrong, the algorithm optimizes in the wrong direction, confidently and expensively. High ROAS campaigns do not happen by accident. They are built on clean, reliable conversion data. If your tracking is broken or incomplete, Smart Bidding is flying blind. What Broken Tracking Actually Looks Like The most common tracking failures I find in Google Ads accounts: duplicate conversion actions counting the same purchase two or three times and inflating reported performance, tracking button clicks or page views instead of completed purchases or actual qualified leads, and conversion windows set too short to capture buyers who take more than a few days to decide. The Fix Audit every conversion action in your Google Ads account before touching any campaign settings. Confirm you are measuring real business outcomes — purchases, form submissions, phone calls from high-intent pages. Enable Enhanced Conversions, which uses hashed first-party data to fill gaps from iOS privacy changes and cookie restrictions. Link your Google Ads account to GA4 and import conversion goals from there for cleaner, more reliable attribution data. Broad Match Keywords Without a Negative Keyword Strategy Why This Is the Number One Budget Killer Broad match keywords tell Google to show your ad for any search it considers related to your keyword. Without guardrails, this becomes a significant problem. A business selling accounting software starts appearing in searches for accountant job vacancies. A gym equipment store starts showing ads to people looking for gym membership deals. The clicks arrive. None of them converts. The budget disappears. Ignoring search term reports wastes 15 to 30% of budgets on irrelevant clicks. When broad match runs without conversion tracking and a strong negative keyword list, the result is exactly what WordStream describes: budget going to searches that will never produce a customer. The Fix Use broad match only when your campaign has at least 30 to 50 conversions per month feeding Smart Bidding. Pair every broad match keyword with a continuously maintained negative keyword list. Review your search terms report weekly — not monthly — and add irrelevant queries as negatives before they accumulate spend. Start bids at 50 to 70% of your exact match bids and adjust upward only as performance data confirms value. Build an account-level negative keyword list from day one. Add informational prefixes like “how to,” “what is,” and “free” if you sell a paid product. Add job-seeking terms, competitor names where relevant, and any industry-adjacent terms that attract the wrong audience. Apply this master list across every campaign. Premature Smart Bidding and Account Fragmentation How Over-Automation Backfires The biggest bidding mistake in 2026 is premature automation — switching to Smart Bidding before accumulating sufficient conversion data. Accounts that follow a maturity-based bidding progression see 34% higher ROAS and 28% lower CPA compared to accounts that immediately adopt automated bidding strategies. Smart Bidding requires data. Without enough conversion history, the algorithm makes statistically uninformed guesses. The result is erratic budget pacing, inflated cost-per-click, and a campaign stuck in permanent Learning Limited status — a warning that means the algorithm cannot optimize effectively because it does not have enough signal. Account fragmentation compounds this problem. Having many small campaigns with minimal individual budgets is one of the most common structural mistakes in Google Ads management. Modern AI needs data density. When you fragment your account across too many campaigns, you dilute the signals that Smart Bidding depends on. If a campaign does not reach at least 30 to 50 conversions per month, Target CPA or Target ROAS bidding cannot optimize effectively. The Fix Start new campaigns on Maximize Clicks or manual CPC to build a conversion history before switching to automated bidding. Move to Smart Bidding only after consistent monthly conversion volume is established. Consolidate fragmented campaigns by grouping related products or services — fewer, larger, better-fed campaigns outperform many small data-starved ones every time. Ignoring the Search Terms Report Before Running Ads The Free Optimization Most Advertisers Skip The search terms report shows you the actual queries that triggered your ads. It is the clearest possible picture of where your budget is actually going versus where you think it is going. In most unoptimized accounts, a significant portion of spend

Why Your Google Ads Are Wasting Budget(2026) Read More »

Shopify vs WooCommerce: Which is better

Shopify vs WooCommerce: Which is better(2026)?

Shopify vs WooCommerce: Which is better? The question is asked more than any other when someone is starting an e-commerce business. Shopify vs WooCommerce: Which Platform Wins in 2026? Both platforms are genuinely good. Both power millions of successful online stores. And both have real limitations that nobody mentions in the sponsored comparison articles designed to send you through an affiliate link. I have worked with stores built on both platforms — simple product catalogues and complex multi-variant inventories, early-stage brands and businesses doing seven figures a year. The honest answer is that there is no universal winner. There is a winner for your specific situation, your technical comfort, your budget, and how you plan to grow. This article is that honest comparison — based on what both platforms actually look like in 2026, including the new features, the updated pricing, and the limitations that only become visible after you have been running a store for twelve months. What Each Platform Actually Is Before comparing anything, it is worth being precise about what you are actually choosing between — because they are fundamentally different types of tools. Shopify is a fully hosted, closed ecommerce platform. You subscribe to it. Shopify manages the hosting, security, performance, and software updates. You build within their system. A new store can go from signup to live in two to four hours. The trade-off is that you operate within Shopify’s boundaries — you cannot change the URL structure without workarounds, cannot fully customise the checkout without Shopify Plus, and are dependent on Shopify’s roadmap for features and pricing changes. WooCommerce is a free, open-source e-commerce plugin that runs on top of WordPress. It is not a standalone platform — it requires WordPress, a hosting plan, a domain, and configuration before your store exists. This means more setup complexity upfront, but complete ownership and control over every aspect of your store indefinitely. That fundamental difference — hosted SaaS versus self-hosted open-source — flows through every single comparison point below. Pricing: What You Actually Pay in 2026 This is where most comparison articles mislead people by quoting headline prices rather than the total cost of ownership. Shopify Pricing in 2026 Shopify’s current plans, billed annually: Basic: $29/month (~₹2,400/month) — suitable for single-person stores with basic needs Shopify: $79/month (~₹6,600/month) — for growing stores needing more staff accounts and reports Advanced: $299/month (~₹25,000/month) — for scaling businesses needing advanced analytics and lower transaction fees Shopify Plus: From $2,500/month — enterprise tier Note: Monthly billing is 25% higher across all plans. Transaction fees of 0.5% to 2% apply if you use a payment processor other than Shopify Payments. Premium apps — which most stores eventually need — add $50 to $500 per month, depending on your stack. A realistic Shopify store doing $500K in annual revenue pays approximately $4,800 to $9,600 per year when you include the plan cost, essential apps, and transaction fees. WooCommerce Pricing in 2026 The WooCommerce core plugin is free. Your real costs are: Hosting: $10 to $120 per month, depending on provider and traffic Domain: $12 to $20 per year Premium extensions: $500 to $2,000 per year for a feature-complete mid-market store Security and maintenance: either your time or a developer’s A WooCommerce store doing the same $500K in annual revenue pays approximately $2,400 to $5,400 per year. It is cheaper at most revenue levels — but it is not free in practice, and the hidden cost is the time and technical expertise required to manage it. The Honest Cost Verdict If you have zero technical background and want to focus entirely on your products and marketing, Shopify’s all-in pricing is fair for the convenience it provides. If you have technical resources — a developer on retainer, or the ability to manage WordPress yourself — WooCommerce delivers significantly better value at scale. Ease of Use: The Setup Reality Shopify wins on simplicity without any debate. A new store can go live in hours with no server management, no hosting configuration, and no plugin setup. Shopify handles everything in the background — updates, security certificates, infrastructure — while you focus on products. WooCommerce requires WordPress first. Then, the hosting setup. Then plugin configuration. Then, ongoing maintenance, updates, backups, and security monitoring. The initial setup adds 10 to 40 hours of work compared to Shopify, and that ongoing management responsibility never fully disappears. This is not a knock against WooCommerce — it is simply the nature of a self-hosted platform. The developers and store owners who prefer WooCommerce do so precisely because they want that control. But for a first-time store owner with no technical background, the setup process is genuinely complex, and the ongoing maintenance is a real ongoing commitment. If you want to launch fast with minimal technical involvement, Shopify wins clearly. If you have technical capability and want full ownership of your platform, WooCommerce is worth the setup investment. Features: What Each Platform Does Out of the Box Shopify’s built-in feature set expanded dramatically over the past year. In 2026, every plan includes: Unlimited products Discount codes and gift cards Abandoned cart recovery Basic analytics and reports Shopify POS for in-person selling — the only ecommerce platform that includes a functional point-of-sale system at standard pricing Built-in tax calculation, including automatic international tax pricing by country Shopify Payments — no additional transaction fees when used WooCommerce’s core plugin covers the essentials well but relies on extensions for most advanced functionality. Subscription products, advanced analytics, product bundles, multi-currency, memberships — these all require paid plugins. The extension library is enormous and genuinely covers almost any use case, but the cost and integration complexity add up. Shopify wins on features out of the box. WooCommerce wins on the ceiling of what is possible when you are willing to build it. AI Tools: Shopify’s Biggest 2026 Advantage This is where Shopify has pulled significantly ahead, and it deserves specific attention. Shopify Sidekick became generally available in January 2026 as part of the Winter ’26 Renaissance

Shopify vs WooCommerce: Which is better(2026)? Read More »

facebook ads for real estate how i generated 500+ leads

Facebook Ads for Real Estate: How I Generated 500+ Leads

Facebook Ads for Real Estate: How I generated 500+ real estate leads using a specific Facebook Ads funnel and ad strategy. Here is the exact targeting, creative, and follow-up system I used — and the CPL numbers behind it. Facebook Ads for Real Estate With the Lowest CPL I want to start with a number that still surprises me when I think about it. The first month I ran a properly structured Facebook Ads campaign for a real estate project, we generated 74 qualified leads at a cost-per-lead of ₹340. The previous agency had been running the same budget for three months and averaging ₹1,800 CPL. Same city, same project, same target buyers. Different strategy. By the end of month four, we had crossed 500 leads. Not form fills from vaguely curious people — actual qualified prospects who answered a screening questionnaire, confirmed their budget range, and expressed genuine purchase intent. A significant portion of those converted into site visits. Several of those converted into actual sales. This article is the exact strategy I used. Not a generalised overview — the actual targeting logic, ad structure, funnel sequence, creative approach, and follow-up system that produced those results. I am writing this the way I wish someone had written it for me before I spent months testing what did not work. Why Facebook Ads Work for Real Estate but Most Campaigns Fail The Platform Advantage Nobody Uses Correctly Facebook remains the most cost-efficient channel for real estate lead generation, outperforming property portal leads on a cost basis by significant margins. While search intent leads from Google or housing portals have higher immediate purchase intent, Facebook ads generate volume at the top of the funnel — allowing you to build a pipeline for three to six months out at a fraction of the cost. The average real estate CPL on Facebook across 2025 and into 2026 averaged ₹1,200 to ₹2,200 across most Indian real estate markets when campaigns were run without proper structure. With the right strategy, that number drops by 40 to 60%. The reason most real estate Facebook campaigns fail has nothing to do with the platform. It has to do with running awareness-level ads and expecting decision-stage conversions. People scroll Facebook casually. They are not searching for a property. You have to earn their attention, qualify their intent, and build enough trust that they willingly raise their hand — in that order. Most campaigns skip the first two steps and go straight to “Book a Site Visit Today.” That is why they generate expensive, low-quality leads. The Special Ad Category Reality in 2026 One thing you must know before setting up any real estate campaign on Facebook: housing ads fall under the Special Ad Category. This restricts certain demographic targeting options — you cannot target by age, gender, or specific ZIP codes the way other advertisers can. What this means practically: success in 2026 real estate Facebook advertising relies less on manual audience selection and more on creative qualification — using the ad content itself to attract the right buyer while letting Meta’s machine learning handle distribution. Your creative does the filtering. The algorithm does the finding. This is actually a better system than it sounds, once you understand how to use it. The Three-Stage Funnel I Built Before I describe any individual ad or targeting choice, I want to explain the overall structure. Everything else is built around this funnel — and every campaign I have run that has failed skipped one of these three stages. Stage 1: Awareness — Build the Retargeting Pool The goal of this stage is not leads. The goal is attention and engagement from people who match the profile of a real buyer. I run video ads here — specifically, short walkthrough tours of the property, neighbourhood highlights, or honest educational content like “What You Should Know Before Buying a Flat in [City].” These are not sales ads. They are interesting ads. I want people to watch at least 50% of the video because that tells me they are genuinely interested — not just passively scrolling. Every person who watches 50% or more of a video gets added to a custom audience automatically. This is your warm retargeting pool. It costs almost nothing to build. The CPM on video awareness ads is low. And the people inside that pool are significantly more likely to convert when you reach them in Stage 2. Stage 2: Lead Capture — Facebook Instant Forms With Qualification This is where the leads come from. Once someone is in the retargeting pool from Stage 1, I target them with a Lead Generation campaign using Facebook Instant Forms. The form is not a basic “Name, Number, Email” form. A basic form generates cheap, low-quality leads because the friction is too low — anyone taps it without thinking. I use a higher-intent form structure that includes two or three qualifying questions: “What is your approximate budget for this property?” (Multiple choice: Under ₹50L / ₹50L–₹1Cr / ₹1Cr–₹2Cr / Above ₹2Cr) “What is your timeline for making a purchase decision?” (Immediately / Within 3 months / Exploring for later) “Are you looking for a home or an investment property?” These questions do two things. First, they filter out casually curious people. Anyone unwilling to answer three simple questions is not a serious buyer. Second, they give your sales team context before they make the first call, which dramatically improves conversion rates from lead to site visit. Stage 3: Retargeting — Re-engage Drop-Offs and Build Lookalikes Stage 3 targets two groups: people who opened the Lead Form but did not submit, and existing converted leads who can be used to build a Lookalike Audience for prospecting. People who opened the form and did not submit are high-intent individuals who got cold feet or got distracted. Reaching them again with a slightly different message — social proof, a testimonial video, a limited-availability angle — recovers a meaningful percentage of those leads at very

Facebook Ads for Real Estate: How I Generated 500+ Leads Read More »

How I Ranked a New Website in 30 Days

How I Ranked a New Website in 30 Days

How I Ranked a New Website in 30 Days — A Real SEO Case Study. I ranked a brand new website on Google’s first page in 30 days without paid ads. Here is the exact SEO strategy, keyword plan, content structure, and technical steps I used — with real numbers.  How I Ranked a New Website in 30 Days The most common question I get from people who have just launched a website is some version of this: “I have been live for two months, and Google has not sent me a single visitor. What am I doing wrong?” Almost always, the answer is not one big thing. It is a collection of small decisions — made at setup, never revisited — that together make the site invisible to search engines. The technical foundation was skipped. The keywords were not researched properly. The content was written for the owner, not for the person searching. And no one told Google the site existed. I want to share a real case study — an actual website I built and ranked within 30 days — with the exact steps I followed, the exact mistakes I almost made, and the real numbers behind the results. Not a hypothetical framework. A specific situation with specific decisions and specific outcomes. If you are sitting with a new website that is not ranking, or you are about to launch one and want to give it the best possible start, this is the article I wish I had found when I started. What the Website Was and What I Was Working With The Project The website was a services-based site in the digital marketing niche — specifically targeting small business owners seeking help with SEO and paid advertising in Indian markets. Fresh domain. Zero domain authority. Zero backlinks. Zero existing content. The complete starting point. The competitive landscape was not empty. There were established agencies, individual consultants, and informational blogs already ranking for the terms I wanted. But there was a clear gap — none of them were speaking directly to small business owners in plain, practical language. Most of the existing content was either too technical or too generic. That gap was the opportunity. What Most People Get Wrong at This Stage Launching a new website is like opening a store in a hidden alley — you might have great products, but nobody will find you. New websites face a specific structural challenge. They lack domain authority, have no backlink profile, and compete against established players who have dominated search results for years. Google’s algorithms inherently trust older, proven websites over newcomers. The response to this challenge that does not work is trying to rank for broad, highly competitive keywords immediately. A new website cannot beat an established domain for “digital marketing agency India” in 30 days. Possibly not in 30 months. But a new website absolutely can rank for specific, lower-competition, high-intent keywords within 30 days — if the strategy is built around them from day one. That decision — targeting the right keywords before writing a single word of content — is where this entire case study begins. Week 1: Technical Foundation and Keyword Strategy Day 1 to 3 — Setting Up the Technical Foundation Before any content was written, I spent the first three days building the technical foundation that Google needs to find, crawl, and understand a new website properly. Skipping this step is the single most common reason new websites take six months to rank instead of six weeks. Google Search Console and Google Analytics 4: Connected both on day one. Submitted the XML sitemap to Search Console immediately. This tells Google the website exists and gives it a map of every page. A new website that does not submit its sitemap can wait weeks or months for Google to discover it organically. Page speed and Core Web Vitals: Ran the site through Google PageSpeed Insights on day one. Compressed all images to WebP format. Deferred non-critical JavaScript. Removed any unused plugins or scripts. Target was above 80 on mobile — achieved 87. Site architecture: Set up a clean, logical URL structure with a flat hierarchy. Homepage — Service pages — Blog. No deep nested pages. No confusing URL strings. Every important page within two clicks of the homepage. Schema markup: Added Organization schema to the homepage, Service schema to each service page, and Article schema to the blog setup before any posts were written. This tells Google precisely what each page is about and increases the likelihood of rich results from the first indexed page. robots.txt and canonical tags: Configured robots.txt to allow crawling of all content pages. Added self-referencing canonical tags to prevent any future duplicate content issues as the site grew. This took three days of focused work. None of it is glamorous. All of it is essential. Day 3 to 7 — Keyword Research Mapped to Specific Pages This is the step that determined whether the next 27 days of work would produce results or not. I made one foundational decision upfront: I would not target the keywords I wanted to rank for. I would target the keywords I could actually rank for on a new domain within 30 days — and build toward the competitive terms as authority grew. The keyword research process I followed had three stages. Stage 1 — Identify buyer-intent long-tail keywords with low competition. Using Ahrefs and Google’s own autocomplete, I built a list of keywords with search volumes between 100 and 1,000 monthly searches, keyword difficulty below 20, and clear commercial or transactional intent. Keywords like “Google Ads for small business India,” “how to improve Shopify store SEO,” and “Facebook ads for local business India” — specific enough that competition was low, intent-rich enough that ranking for them would drive actual enquiries. Stage 2 — Map each keyword to a specific page. Every keyword got assigned to one page — either an existing service page or a planned blog post. No

How I Ranked a New Website in 30 Days Read More »

How to Rank a Shopify Store on Google

How to Rank a Shopify Store on Google’s First Page 2026

How to Rank a Shopify Store on Google in 2026: A Step-by-Step Guide to building a clean-looking store, adding good products, and setting up their payment gateway. How to Rank a Shopify Store on Google in 2026 Ranking a Shopify store on Google requires far more than installing an SEO app and sprinkling keywords into product titles. In 2026, Google’s AI-driven algorithms evaluate topical authority, page speed, structured data, and user experience as interconnected ranking signals. And with Shopify powering roughly 30% of U.S. ecommerce websites, organic search is one of the fiercest competitive arenas for online merchants. I have worked with Shopify stores across multiple categories — apparel, home goods, supplements, electronics, and accessories — and the stores that rank are not necessarily the ones with the biggest budgets. They are the ones who get the fundamentals right consistently across every layer of SEO. This is the complete, step-by-step article to rank a Shopify store on Google in 2026. Every step is in sequence — from technical foundation through to content, links, and AI search visibility. Follow it in order. Skip nothing. Step 1: First Get Your Technical Foundation Right Everything else in this guide depends on Google being able to find, crawl, and understand your store. If the technical foundation is broken, nothing else matters. 1. Connect Google Search Console and Submit Your Sitemap This is the first thing you do with a new Shopify store — not the last. Go to Google Search Console, verify ownership of your domain, and submit your Shopify sitemap. Shopify automatically generates a sitemap at yourstore.com/sitemap.xml. Submit it. This tells Google your store exists and gives it a map of every page it should index. Check Search Console weekly for crawl errors, indexing issues, and manual actions. These will surface problems you would otherwise not notice for months. 2. Fix Your robots.txt File Block the robots.txt.liquid template to block /checkout, /cart, and /admin/ paths. This saves crawl budget on your revenue-generating pages. Google has a limited amount of attention it gives your site on each crawl. Do not waste it on pages that should never rank. 3. Eliminate Duplicate Content With Canonical Tags Shopify tends to create multiple paths to the same product. Use correct canonical tags in your theme to tell Google: there are three URLs of this product, but rank this particular one. This is one of Shopify’s most common built-in SEO problems. Left unaddressed, duplicate URLs dilute your ranking potential across multiple pages instead of concentrating it on one. 4. Handle Deleted Products and Redirects Properly Always leave a deleted product as a 404. Go to Navigation in Shopify and use the URL Redirects to redirect the old traffic to the most appropriate active page without losing your Google position or user experience. Every time you delete a product and do not redirect the URL, you are throwing away whatever ranking authority that page had built up. Set up 301 redirects immediately when products are removed or URLs change. Step 2: Build a Clean, Logical Site Structure Google crawls your site by following links. If your structure is messy — collections buried deep, orphaned product pages, no clear hierarchy — it becomes harder for Google to understand what your store is about and how pages relate. The rule I follow for every Shopify store I work on: keep important pages within two clicks of the homepage whenever possible. Your structure should follow a clear hierarchy: Homepage → Collection Pages → Product Pages. Every product should belong to at least one collection. Every collection should be accessible from the main navigation or a clear category menu. This serves two purposes. First, it makes Google’s crawl path efficient and logical. Second, it passes link authority from your homepage — your strongest page — down to your collections and products through internal links. Step 3: Do Keyword Research Mapped to Specific Pages Start by listing your main product categories. Then use Google Autocomplete and Amazon search to see what completions appear for each category. These completions represent real, high-frequency searches. Feed your best keywords into a tool like Ahrefs or Semrush to see search volume, keyword difficulty, and the pages currently ranking. Map each keyword to a specific page on your store — collection pages for category terms, product pages for specific product searches, and blog posts for informational queries. This mapping step is critical, and most store owners skip it. Without it, you end up with multiple pages targeting the same keyword — competing with yourself — or important keywords with no page targeting them at all. The keyword-to-page map should look like this: Collection pages → high-volume category keywords (“men’s leather wallets,” “yoga mats for beginners”) Product pages → specific product keywords (“slim bifold leather wallet black,” “6mm thick non-slip yoga mat”) Blog posts → informational queries (“how to care for a leather wallet,” “what thickness yoga mat do I need”) Step 4: Optimize Every Product Page Properly On-page SEO is where most store owners spend their time, and for good reason. It is the content you control completely. Every product page, collection page, and blog post is an opportunity to rank for specific keywords. 1. Title Tags Your title tag is the headline that appears in search results. It should be under 60 characters and include your primary keyword near the beginning. The formula is: Brand + Product Name + Key Attribute. Rather than “Summer Dress,” it should be “Azure Silk Maxi Summer Dress – Breathable and Lightweight.” This picks up niche-level searches and improves your ranking significantly. 2. Meta Descriptions Your meta description is the snippet of text below the title in search results. It does not directly affect rankings, but it influences whether people click. Keep it under 160 characters, include your keyword naturally, and add a clear call to action. 3. Product Descriptions Google rewards Information Gain in 2026, which is content that is not a duplicate of the manufacturer’s product description. Avoid thin content.

How to Rank a Shopify Store on Google’s First Page 2026 Read More »

5-Step Marketing Framework for Consistent ROI

5-Step Marketing Framework for Consistent ROI 2026

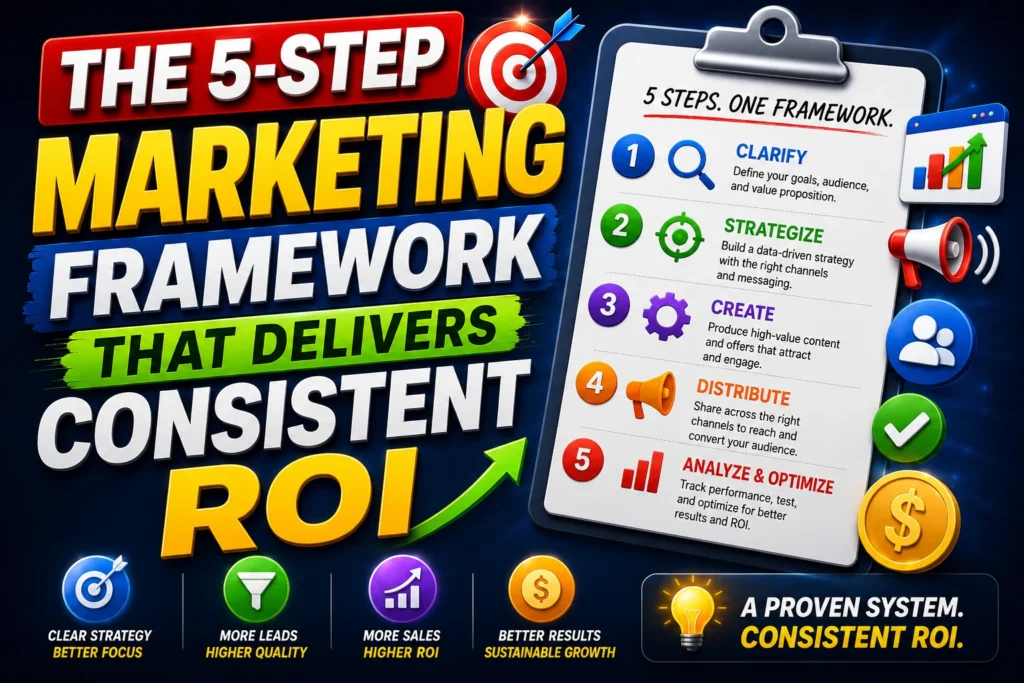
Stop running campaigns without this 5-Step Marketing Framework for getting consistent ROI. I use it to launch and optimise marketing campaigns that deliver consistent ROI every single time.  The most dangerous place you can be in digital marketing is busy without being profitable. The 5-Step Marketing Framework to Get A Consistent ROI I have seen it more times than I can count — businesses running Google Ads, Meta Ads, and SEO simultaneously, spending serious money every month, and getting back results that do not add up. The dashboard looks active. The campaigns are running. But when you pull back and look at actual revenue generated versus actual money spent, the numbers either barely break even or quietly bleed red. The reason is almost always the same. There is no system behind the spending. There is an ad here because someone said video ads are working. A retargeting campaign is there because a competitor seems to be doing it. A blog post because content marketing is important. Individual pieces, individually reasonable, but no consistent logic connecting them — and therefore no consistent outcome from them. The businesses that dominate their digital channels in 2026 are not those with the biggest budgets — they are the ones with the most disciplined execution systems. That is what this article is about. What I am sharing here is the five-step framework I use every time I launch or audit a marketing campaign — for ecommerce stores, real estate projects, SaaS businesses, and service providers. It is the same logic regardless of industry. It is the reason some campaigns consistently produce predictable ROI while others consistently disappoint. Why Most Marketing Campaigns Fail Before They Launch The Guesswork Problem Most marketing campaigns are built on optimism rather than structure. The offer sounds good. The creative looks clean. The budget feels reasonable. So the campaign goes live — and then the wait begins. Did it work? Maybe check in a week. Maybe adjust something. Maybe try a different audience. Sporadic optimisation — the “set and check quarterly” approach — produces consistently mediocre results. The gap between campaigns that work and campaigns that do is not explained by spend. It is explained by whether there is a systematic process behind them. What a Framework Actually Does A proper campaign framework does four things that guesswork cannot. It forces clarity before money is spent — on who the audience is, what outcome you want, and how you will measure success. It creates a repeatable process that produces comparable results across different campaigns and different channels. It separates what is working from what is not, so you scale the right things rather than scaling everything and hoping for the best. And it gives you a structured diagnostic when something goes wrong — instead of staring at a dashboard wondering what to change. A strong marketing accountability framework ensures that every campaign is tied to measurable KPIs, supported by reliable analytics systems, and aligned with business objectives. Here is the framework, step by step. Step 1: Define the Outcome Before You Define the Campaign Start With the Revenue Goal, Not the Ad Format The single most common mistake I see when reviewing campaigns is that someone decides on the channel and format before determining what outcome they actually need. “We need to run Facebook Ads” is not a marketing strategy. “We need to generate 40 qualified leads per month at a cost of under ₹500 per lead to meet this quarter’s sales target” is a strategy. Everything else follows from that clarity. Before any campaign is built, I answer four questions without compromise: What is the specific, measurable outcome this campaign needs to produce? Not “more leads” or “more traffic” — a number. 50 leads. 200 purchases. 1,000 email subscribers. A number creates accountability and makes every subsequent decision testable. What is the maximum cost per outcome that makes this campaign financially viable? If your product margin is ₹4,000 and your average customer only buys once, spending ₹2,500 to acquire them leaves a thin ₹1,500 margin. The acceptable CPL or CPA is a business mathematics question, not a marketing question. Who exactly is this campaign trying to reach? Not a demographic. A person. What do they worry about? What language do they use when searching for what you offer? What has stopped them from buying before? The more specifically you can answer this, the more precisely your creative, copy, and targeting can address it. How will you measure success? Before the campaign launches, the measurement system needs to exist—conversion tracking, UTM parameters, CRM integration. Continuous testing and optimisation are crucial to maximising your digital marketing ROI — but you cannot optimise what you cannot measure. Answer these four questions completely before touching any ad platform, and the campaign you build will be fundamentally more coherent than 80% of what your competitors are running. Step 2: Build the Funnel, Not Just the Ad Why Single-Ad Campaigns Almost Always Underperform A single ad asking a cold audience for a purchase, a booking, or a high-commitment action is structurally inefficient. People do not buy from strangers. They buy from sources they have encountered, found useful, and begun to trust. In 2026, social media is a discovery engine, lead generator, and brand-building powerhouse. The role of each touchpoint in the customer journey is different — and treating them as interchangeable is where most ad budgets leak. The Three Funnel Stages That Work Together Top of Funnel — Awareness and Discovery. This is where you introduce yourself to people who match your buyer profile but do not yet know you exist. The goal is not conversion. The goal is attention and a positive first impression. Video content, educational posts, and problem-aware messaging work here. Cost is low. Conversion intent is low. But this stage builds a warm audience that makes everything downstream cheaper. Middle of Funnel — Consideration and Trust. This is where you deepen the relationship with people who have already engaged with your

5-Step Marketing Framework for Consistent ROI 2026 Read More »

keyword research for beginners with a step-by-step process

Learn Keyword Research for Beginners in 2026

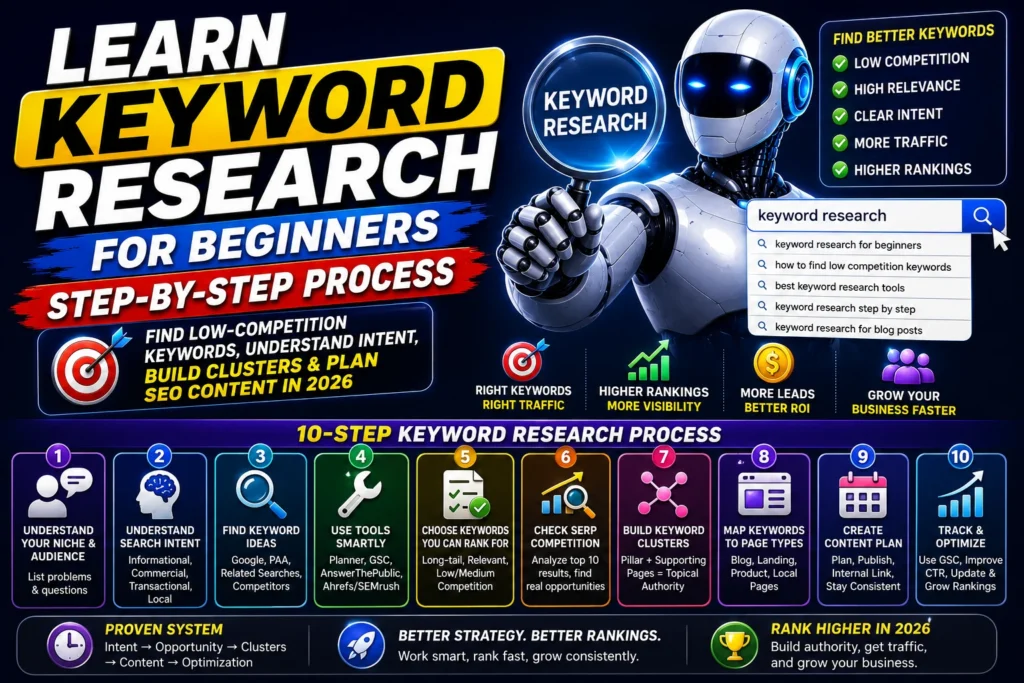
Learn keyword research for beginners with a step-by-step process to find low-competition keywords, understand search intent, build clusters, and plan SEO content in 2026. If you’re starting with SEO, keyword research can feel confusing—tools show hundreds of numbers, everyone gives different advice, and you’re left wondering: Which keywords should I actually target? Here’s the truth: keyword research is not about chasing high search volume. It’s about understanding what people want (intent), finding opportunities you can realistically rank for, and building a content plan that consistently grows traffic. From my experience working on 25+ SEO projects and optimizing 45+ websites, the websites that grow fastest are the ones that follow a simple system: Intent → Opportunity → Clusters → Content → Optimization This guide will teach you keyword research for beginners in a practical way—so you can find keywords, plan content, and start ranking. (Internal link suggestion: Link this article to your pillar guide: How to Start Digital Marketing from Scratch and to your SILO article: SEO for Beginners.) What is Keyword Research? Keyword research is the process of finding the words and phrases people type into Google and selecting the best ones to target with your content or pages. But in modern SEO, it’s more than “finding keywords.” It’s about: Understanding search intent Finding rankable opportunities Creating topic clusters Matching keywords to the right page type (blog, landing page, product page) Why Keyword Research Matters in 2026 Keyword research matters more in 2026 because: Google (and AI search) rewards intent-matching content, not keyword stuffing Competition is higher, so you need smarter targeting Keyword clusters help build topical authority CTR matters—choosing the right angle/title can increase clicks without higher rankings Businesses care about leads and sales, so keyword intent decides ROI A keyword is valuable only if it brings the right user, not just traffic. Step-by-Step Keyword Research Process for Beginners Step 1: Start With Your Niche + Customer Problems Before tools, you need clarity. Ask: Who is my audience? What problems do they have? What do they search for before buying? Example niches + problem-to-keyword ideas: Real estate: “best location to buy a flat in…” E-commerce: “best shampoo for…” / “how to choose…” Services: “cost of…” / “near me” / “best agency for…” Beginner tip: Write a list of 20–30 customer questions first. Tools come later. Step 2: Understand Search Intent (This Decides What You Rank For) Search intent is the reason behind a search. The 4 Main Types of Intent Informational: learning something “What is keyword research?” Commercial: comparing options “best keyword research tools” Transactional: ready to take action “Buy running shoes online.” Local: location-based “SEO expert in Rewari” What beginners should target first: ✅ Informational + Commercial long-tail keywords (easier to rank, strong traffic potential) What businesses love: ✅ Transactional + Local keywords (high conversion) Step 3: Find Keyword Ideas Here are the best beginner methods (free + easy): A) Google Autocomplete Type your topic and see suggestions. Example: Type “keyword research” → “keyword research for beginners” “keyword research tool” “keyword research for YouTube” B) People Also Ask (PAA) These are real questions Google shows. Use these as: H2/H3 headings FAQ section cluster topics C) Related Searches Scroll to the bottom of Google search results. D) Competitor Research (Simple Version) Search your keyword and look at: What top pages cover Which subtopics they include What keywords appear in their headings (Internal link suggestion: Link “intent” and “SEO basics” to your SEO for Beginners article.) Step 4: Beginner-Friendly Tools for Keyword Research You don’t need 10 tools. Start with these: Free tools Google Keyword Planner (basic volumes + ideas) Google Search Console (once you have a site) AnswerThePublic (question-based keyword ideas) Paid tools (optional) Ahrefs / SEMrush (best for competition + clustering) Ubersuggest (simple beginner tool) My advice: Start free. Upgrade when you need deeper data. Step 5: Choose Keywords You Can Actually Rank For This is where most beginners fail. They pick: high volume high competition broad topics Instead, use this selection checklist: ✅ Beginner Keyword Selection Checklist Choose keywords that are: Relevant to your niche Clear intent Long-tail (4+ words) Low to medium competition Match your website’s current authority level Good vs Bad Keyword Examples ❌ Bad for beginners: “SEO” “digital marketing” “keyword research” ✅ Better for beginners: “keyword research for beginners” “How to find low competition keywords.” “Keyword research for blog step by step.” “best keyword research tools for beginners” From my experience: long-tail keywords are the fastest path to early rankings. Step 6: Understand Keyword Difficulty (Without Getting Stuck) Keyword difficulty (KD) is a metric some tools use to estimate competition. But don’t rely only on KD. Use real SERP checks. Quick SERP Competition Check Search the keyword and look at: Are top results huge authority sites? (Wikipedia, big brands) Are results exactly matching the keyword intent? Are there weak pages with thin content? Are there forums or low-quality pages ranking? If you see: ✅ smaller blogs ranking ✅ outdated content ✅ weak formatting …you have a good chance. Step 7: Build Keyword Clusters (How You Rank Faster) Google doesn’t just rank pages—it ranks topics. So instead of creating random posts, build clusters. What is a Keyword Cluster? A cluster is a group of related keywords that can be covered in one topic area. Example: Keyword Research Cluster Pillar (main page): Keyword Research for Beginners Supporting cluster articles: How to find low competition keywords Best keyword research tools for beginners Search intent explained Keyword clustering guide Keyword research for blog posts This strategy builds topical authority and helps all articles rank better through internal linking. (Internal link suggestion: Link this cluster to your pillar digital marketing guide and your SEO guide.) Step 8: Map Keywords to the Right Page Type Not every keyword should be a blog post. Here’s a simple mapping: Informational keywords → Blog posts Commercial keywords → Comparison / list posts Transactional keywords → Landing pages Product keywords → Product pages / collection pages Local keywords → Location service pages This

Learn Keyword Research for Beginners in 2026 Read More »

Learn Step by Step SEO for beginners

Learn Step by Step SEO for Beginners in 2026

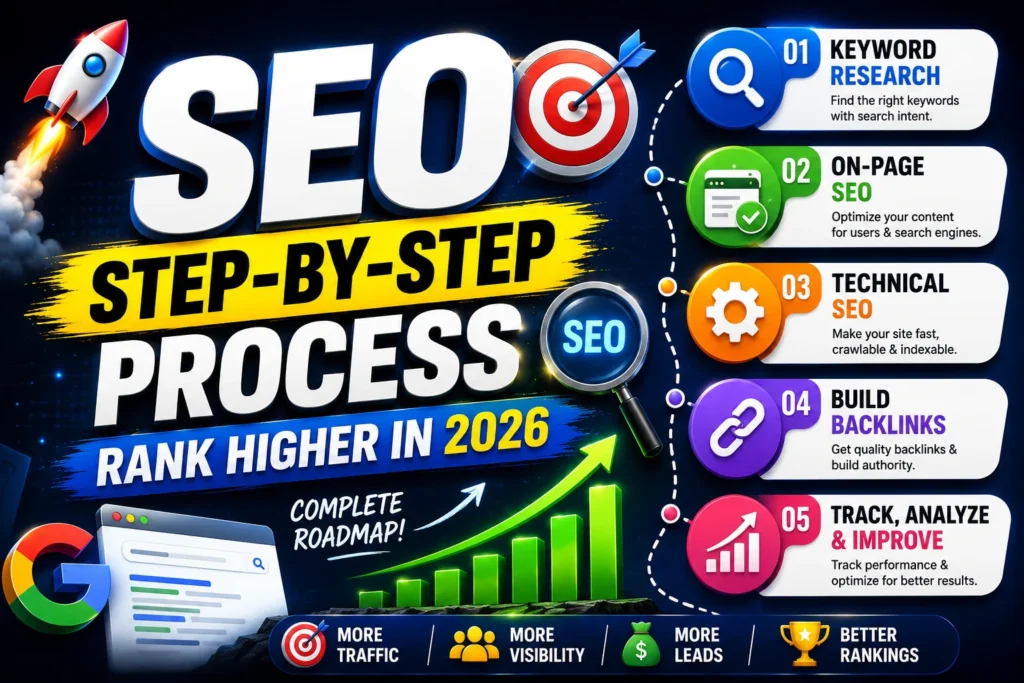
Learn Step by Step SEO for beginners from keyword research, on-page SEO, technical SEO, backlinks, tools, and a weekly workflow to rank in 2026. If you’re learning SEO, you’ve probably noticed something frustrating: most of the articles on the internet either feel too technical, too vague, or full of “tips” that don’t tell you what to do next. SEO isn’t magic. It’s a repeatable system. From my experience working on 25+ SEO projects, SEO results come when you do the basics consistently—intent-based keywords, clean on-page structure, solid technical foundation, and continuous optimization. This article gives you a practical framework you can follow even if you’re starting from zero. When it’s all said and done, you will know the exact steps to do SEO and what you need to pay attention to in order to get rankings on Google in 2026. What is SEO? SEO is an acronym for Search Engine Optimization. This is the practice of ensuring that your website ranks highly in search results, especially on Google. In simple words: SEO is how you drive traffic from the correct audience who is looking for what you have to offer. How Google Works (Beginner Explanation) To rank your page on Google’s Search engine results page, Google follows these three steps: Crawling: Google finds out about your pages through links and sitemaps Indexing: Google stores all the data of your webpage in its database Ranking: Google decides which page is more relatable and deserves to show at the top As an SEO expert, I have to make it easy for Google to crawl and understand my site, create content that is relevant to the searcher, and give a genuinely accurate result. Why SEO Matters in 2026 SEO keeps evolving. It is a slow and time-consuming process, but it’s still one of the highest-ROI marketing channels. Here are some of the things everyone needs to keep in mind: Search intent is everything: Google wants to show the best answer to the searcher, not the most keyword-stuffed page Helpful Content wins: Pages that genuinely help users outrank thin or generic content EEAT is critical: Experience, expertise, authority, and trust matter more, especially in competitive niches AI-driven search is growing: Clear structure, direct answers, and trusted sources improve visibility in AI summaries Brands want compounding growth: SEO builds long-term traffic instead of paying for every click If anyone wants to learn a skill that stays valuable across industries, SEO is it. Step-by-Step SEO System (Beginner to Pro) Here’s the complete system I recommend to anyone learning SEO. Step 1: Keyword Research Keyword research is the foundation of SEO. If anyone can do good keyword research, it is like 50% SEO already done. Most of the beginners just try to find the high-volume keywords with the maximum competition. Everyone has to focus on the high-volume and low competition keywords for getting faster results. Also, the keyword intent is the most important factor in Keyword Research. Without intent clarity, no one can rank your webpage on Google’s Search engine results page. What matters more than volume is intent + ranking opportunity. Understand Search Intent Every keyword has a “why” behind it. The most common intents: Informational: “What is SEO?” Commercial: “best SEO tools.” Transactional: “hire SEO expert.” Local: “SEO agency near me.” Beginner tip: Start with informational + commercial long-tail keywords. They’re easier to rank and build authority. Choose Long-Tail Keywords First Long-tail keywords are longer and more specific. They usually have: Lower competition Higher conversion potential Clearer intent Examples: ❌ “SEO” ✅ “SEO for beginners step by step.” ✅ “How to do on-page SEO for blog posts.” ✅ “technical SEO checklist for beginners.” A Simple Keyword Research Workflow Pick a niche/topic (example: digital marketing, real estate marketing, skincare) List 20–30 questions beginners ask Use tools like: Google autocomplete “People Also Ask” Google Keyword Planner Ubersuggest / Ahrefs / SEMrush Select keywords based on: Clear intent Low/medium competition Relevance to your audience Group them into clusters (more on this below) From my experience: keyword clustering is one of the fastest ways to build authority and speed up rankings. Step 2: On-Page SEO (Your Ranking Essentials) On-page SEO is what you do on the page to help Google understand your content and to improve user experience. Here’s a practical checklist you can apply to every page. On-Page SEO Checklist (Beginner) ✅ Title tag: include the main keyword + make it clickable✅ Meta description: summarize the benefit clearly✅ H1: use one H1 (usually your page title)✅ H2/H3: organize content logically✅ First 100 words: naturally mention your main keyword✅ Internal links: link to related pages on your site✅ Image alt text: describe the image (include keywords naturally)✅ Short paragraphs + bullets: improve readability✅ Answer intent: your page must satisfy the query better than competitors Title Tag Example (Good vs Bad) ❌ “SEO Guide.” ✅ “SEO for Beginners: Step-by-Step Guide to Rank on Google (2026).” Internal Linking (Beginner Advantage) Internal links help: Google crawls your site Distribute authority Increase time on site Improve topical relevance Internal linking example:If you write “SEO for beginners,” link to: a keyword research guide a technical SEO checklist An on-page SEO checklist Step 3: Technical SEO (Make Your Site Rankable) Technical SEO is the behind-the-scenes work that ensures Google can crawl, index, and trust your site. This is the part most beginners ignore—but it’s often the reason good content doesn’t rank. Technical SEO Checklist for Beginners Here is the list of all the Technical SEO Checklist points that everyone must check out on their website to improve their ranking on google search engine result page. ✅ Indexing: check in Google Search Console✅ Mobile-friendly: responsive design✅ Core Web Vitals: fast loading, stable layout✅ Clean URL structure: short and readable✅ XML sitemap: helps Google discover pages✅ No broken pages: fix 404s and redirect issues✅ HTTPS security: must-have✅ Duplicate content control: canonical tags where needed Quick Technical Checks You Should Do 1) Is your page indexed?Open Google and type:site:yourdomain.com/page-urlIf it doesn’t show, check Search Console. 2) Is

Learn Step by Step SEO for Beginners in 2026 Read More »

Technical SEO A Complete Step-by-Step Guide

Technical SEO A Complete Step-by-Step Guide 2026

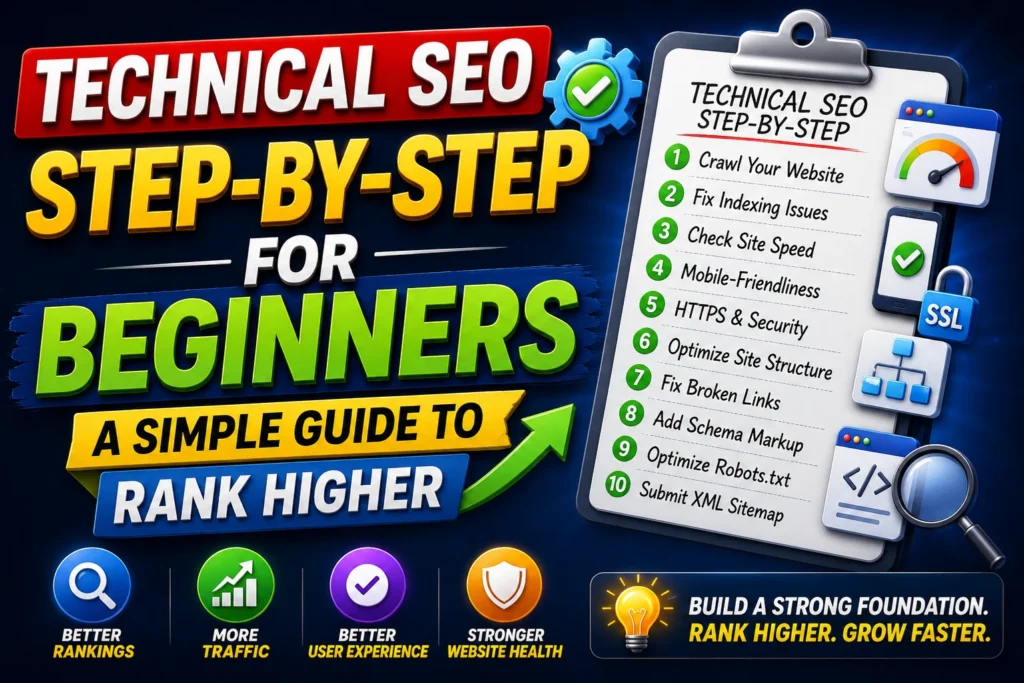
Learn technical SEO made simple in 2026: indexing, crawlability, site speed, Core Web Vitals, mobile SEO, sitemaps, and fixes you can apply step-by-step. If you’ve written good content and done on-page SEO, but your pages still don’t rank, there’s a high chance the problem is technical SEO. Technical SEO is the foundation that helps Google crawl, index, and rank your website properly. In real projects I’ve worked on (across 25+ SEO projects and 45+ websites), I’ve seen great content fail simply because: pages weren’t indexed Site speed was poor Core Web Vitals were failing Internal crawling was broken Mobile UX was weak The good news? You don’t need to be a developer to fix most technical SEO issues. This guide explains technical SEO made simple, with a practical checklist and an easy workflow you can follow. (Internal link suggestion: Link this article to your SEO for Beginners and On-Page SEO Checklist articles.) What is Technical SEO? Technical SEO is optimizing the technical parts of your website so search engines can: Find your pages (crawl) Store them (index) Understand them (render) Rank them (serve to users) Technical SEO includes: indexing & crawlability site architecture and internal linking page speed & Core Web Vitals mobile optimization HTTPS and security sitemaps & robots.txt duplicate content control (canonicals) structured data (schema) Simple definition:Technical SEO = making your website easy for Google to access, understand, and trust. Why Technical SEO Matters in 2026 In 2026, Google is more strict about: page experience (speed + mobile + stability) crawl efficiency (how easily Google can discover your important pages) quality control (duplicate pages, thin pages, indexing issues) rendering and usability (sites relying heavily on scripts can cause issues) If technical SEO is weak: your best pages may never get indexed your rankings may be capped your ads and SEO conversions may drop due to slow landing pages Technical SEO Step-by-Step for Beginners Step 1: Indexing Basics (Make Sure Google Can See Your Pages)   Indexing is the #1 tech nical issue for many beginners. If a page isn’t indexed, it cannot rank—no matter how good it is. 1) Check if Your Page is Indexed Use Google search: site:yourdomain.com/page-url Or check inside Google Search Console: URL Inspection → Enter URL → See indexing status 2) Common Reasons Pages Don’t Get Indexed page is blocked in robots.txt “noindex” tag is active duplicate content / canonical pointing elsewhere low-quality/thin content weak internal linking (Google can’t find it) server errors or slow response 3) Quick Fixes for Indexing ✅ Ensure the page is linked from another page✅ Remove accidental “noindex”✅ Fix canonical tag if incorrect✅ Submit sitemap to Search Console✅ Request indexing (URL Inspection → Request Indexing) Pro tip from real work:If a new page isn’t indexed after a few days, internal linking is usually the missing piece. Add 2–5 internal links from relevant pages and re-request indexing. Step 2: Crawlability (Help Google Discover Your Site Efficiently) Crawlability means how easily search engines can navigate your website. Crawlability Checklist ✅ Proper internal linking✅ No broken links (404s)✅ Clean site structure (categories, menus)✅ Sitemap submitted✅ Robots.txt not blocking important pages✅ Avoid deep pages (important pages should be reachable within 3 clicks) Simple Site Structure That Works Home Category/Service Page Sub-pages / Blogs / Product pages This structure helps Google prioritize your important pages and improves crawl efficiency. (Internal link suggestion: Link to your “Keyword Research for Beginners” and “On-Page SEO Checklist” pages from your main service pages.) Step 3: Sitemaps (Make Discovery Easier) An XML sitemap is a list of your important URLs that helps Google find pages. What to Do Generate sitemap (WordPress plugins like RankMath/Yoast or Shopify built-in structure) Submit in Google Search Console: Sitemaps → add sitemap.xml Common Sitemap Mistakes sitemap contains “noindex” pages outdated URLs included lots of low-value pages (tags, filters) included Best practice:Keep sitemaps clean—only include pages you actually want to rank. Step 4: robots.txt (Control Crawling the Right Way) robots.txt tells search engines what to crawl or ignore. Beginner Rule Block only pages you don’t want indexed (admin pages, cart pages, internal search pages) Example pages often blocked: /wp-admin/ /cart/ /checkout/ internal search results pages ⚠️ Warning:Blocking important pages by mistake can kill rankings. Always double-check. Speed Optimization (Site Speed That Impacts Rankings + Conversions) Step 5: Why Speed Matters in Technical SEO Speed affects: rankings (page experience) crawl efficiency (Google crawls faster sites more) conversion rate (slow pages lose leads and sales) In e-commerce and lead-gen campaigns I’ve worked on, improving speed often improved conversions without changing traffic. Step 6: How to Check Your Website Speed Use: Google PageSpeed Insights Lighthouse (Chrome) GTmetrix (optional) Check both: Mobile Desktop Most users are on mobile, so mobile score matters more. Step 7: The Quick Speed Fix Checklist (Beginner Friendly) ✅ Compress images (WebP format if possible)✅ Use caching (plugin or server-level)✅ Reduce heavy plugins/scripts✅ Minify CSS/JS✅ Use a fast theme (avoid bloated builders)✅ Use a CDN (optional but helpful)✅ Remove unused fonts and animations✅ Optimize above-the-fold loading Fast win:Large images are often the #1 speed killer. Fixing images alone can noticeably improve speed. Core Web Vitals Made Simple (The Metrics That Matter) Core Web Vitals are Google’s experience metrics. Don’t overcomplicate them—just know what they mean and how to improve them. Step 8: The 3 Core Web Vitals (Simple Explanation) 1) LCP (Largest Contentful Paint) What it means: How fast the main content loadsGoal: Make the main content appear quickly How to improve LCP: compress images reduce heavy scripts use caching improve hosting 2) CLS (Cumulative Layout Shift) What it means: Does the page jump around while loading?Goal: Keep layout stable How to improve CLS: set fixed sizes for images/videos avoid popups that shift content load fonts properly 3) INP (Interaction to Next Paint) (replaced older interaction metrics) What it means: How fast the page responds when users click or interactGoal: Quick, smooth interactions How to improve INP: reduce heavy JavaScript remove unnecessary animations optimize scripts and plugins Beginner tip:If your site feels “slow” when

Technical SEO A Complete Step-by-Step Guide 2026 Read More »